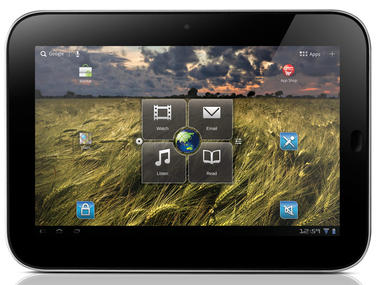
This is an AOSP Jellybean build for the Lenovo Ideapad K1.
The nvflash package will will wipe your entire system. You will lose all data except what is stored on the EXTERNAL sdcard.
You can use the CWM package if you are already using an Ideapad Rom that includes Clockwork Mod recovery. You will need to wipe data before flashing the CWM package.How To Root QMobile Noir A8 Procedure Here
Includes
Issues
Downloads
As always flash at your own risk. I'm not responsible for your device.
Nvflash versions
K1_JB_AOSP.zip
Mirror
25f84b47420098d8c54195d84b3e13e3
CWM versions
CWM_K1_JB_AOSP.zip
ac961c73a9a5792a6c7b049937d43fdf
Instructions
Nvflash version
1. Download one of the packages above and extract it to a directory
2. Power off device
3. Press and hold both the Vol + and Vol - buttons
4. While holding both Volume buttons power the tablet on
5. The screen should go black and the two front LED's should remain lit. You are now in APX mode
6. Connect your device to USB
7a) Windows: Install the APX drivers from the 'drivers' folder
Double click the 'flash-windows.bat' file
7b) Linux: run 'chmod +x flash-linux.sh && sudo ./flash-linux.sh' from the extracted directory
CWM version
1. Download one of the CWM_K1_*.zip versions and move to external sdcard
2. Reboot into recovery
3. Install zip from sdcard
4. Choose zip from sdcard
5. Flash the update.
How to boot into recovery
Non-rooted version
1. Make sure you have the Android SDK installed. http://developer.android.com/sdk/index.html
2. Make sure USB Debugging is enabled on the tablet. Go to Settings > Developers options > and check "USB Debugging"
3. Connect the device to USB
4. Open a terminal or command prompt window and type
- Android Jellybean 4.1.1
- nvflash package includes krook1's ClockworkMod Recovery 6.0.1.1 build that supports both internal and external sdcard
- JB Google Apps
- OTA-UpdateCenter support for future OTA updates
- Reboot option in power menu
- Superuser
Issues
- Video Camera face effects
- Rotation Lock Switch (Software switch works)
- Auto brightness
- 3G support
Downloads
As always flash at your own risk. I'm not responsible for your device.
Nvflash versions
K1_JB_AOSP.zip
Mirror
25f84b47420098d8c54195d84b3e13e3
CWM versions
CWM_K1_JB_AOSP.zip
ac961c73a9a5792a6c7b049937d43fdf
Instructions
Nvflash version
1. Download one of the packages above and extract it to a directory
2. Power off device
3. Press and hold both the Vol + and Vol - buttons
4. While holding both Volume buttons power the tablet on
5. The screen should go black and the two front LED's should remain lit. You are now in APX mode
6. Connect your device to USB
7a) Windows: Install the APX drivers from the 'drivers' folder
Double click the 'flash-windows.bat' file
7b) Linux: run 'chmod +x flash-linux.sh && sudo ./flash-linux.sh' from the extracted directory
CWM version
1. Download one of the CWM_K1_*.zip versions and move to external sdcard
2. Reboot into recovery
3. Install zip from sdcard
4. Choose zip from sdcard
5. Flash the update.
How to boot into recovery
Non-rooted version
1. Make sure you have the Android SDK installed. http://developer.android.com/sdk/index.html
2. Make sure USB Debugging is enabled on the tablet. Go to Settings > Developers options > and check "USB Debugging"
3. Connect the device to USB
4. Open a terminal or command prompt window and type
adb shell k1recovery
Rooted version
From a Terminal Application
Run the follow two commands
From a Terminal Application
Run the follow two commands
su
k1recovery
k1recovery
From adb
1. Make sure you have the Android SDK installed. http://developer.android.com/sdk/index.html
2. Make sure USB Debugging is enabled on the tablet. Go to Settings > Developers options > and check "USB Debugging"
3. Connect the device to USB
4. Open a terminal or command prompt window and type
1. Make sure you have the Android SDK installed. http://developer.android.com/sdk/index.html
2. Make sure USB Debugging is enabled on the tablet. Go to Settings > Developers options > and check "USB Debugging"
3. Connect the device to USB
4. Open a terminal or command prompt window and type
adb shell k1recovery
No comments:
Post a Comment